Manual

Manual

Adapt Mr. Anti Snore in 5 minutes to your teeth.

You will need the following things:

  • 🥛🥛 2 empty wide cups or glasses for water.
  • ⏱️ A stopwatch to measure the seconds for every step.

Instructions for adapting Mr. Anti Snore

1. Place the plastic spatula in the opening on the frontside of the anti snoring mouthpiece.

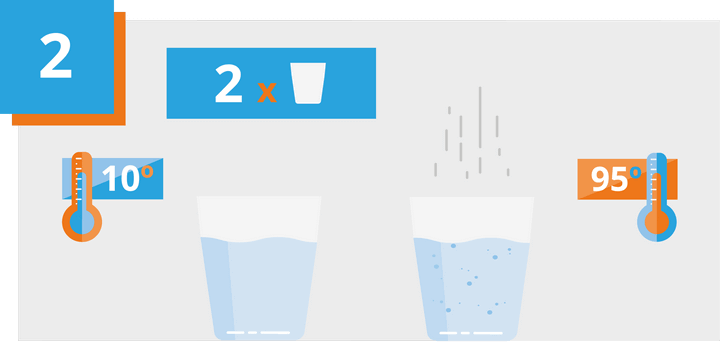
2. Prepare two glasses of water; one with boiled hot water and one with cold water.

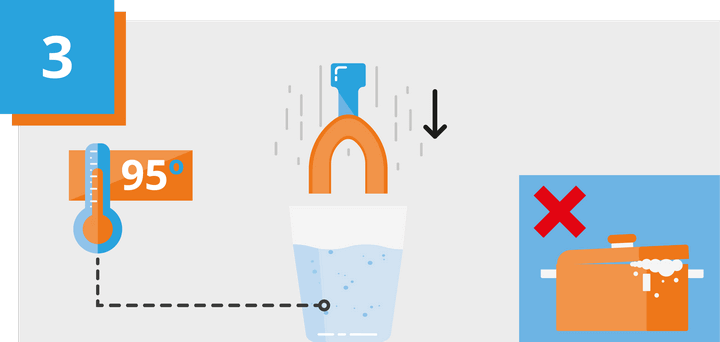
3. Let the boiled water cool down during 15 seconds.
IMPORTANT: Never place the anti snoring mouthpiece in boiling

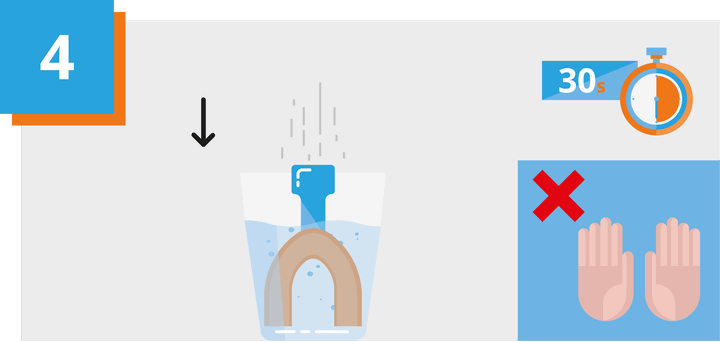
4. Leave the mouthpiece in for 30 seconds.

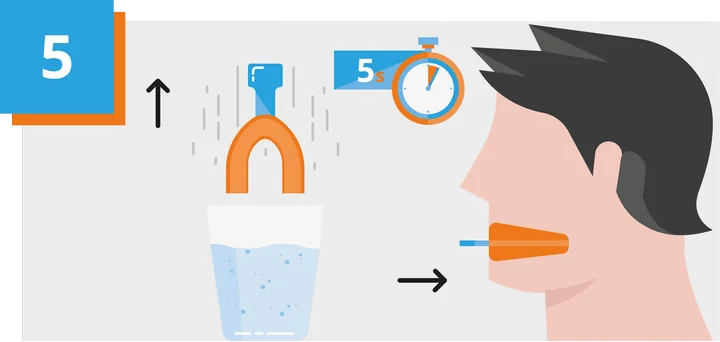
5. Now carefully retrieve the anti snoring mouthpiece from the water using the spatula and let the water drip off.

IMPORTANT: Don’t yet touch the anti snoring mouthpiece with your fingers and leave the spatula inside.

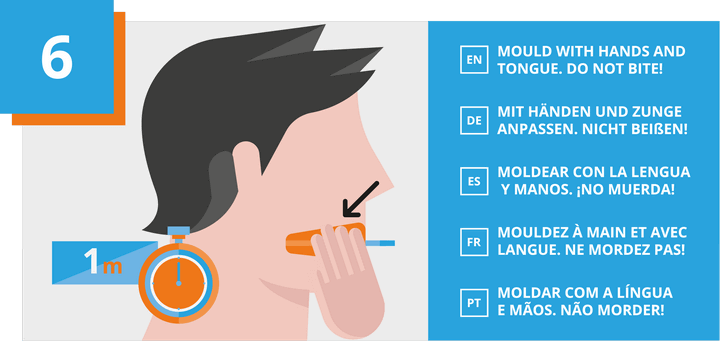
6. Now place the anti-snoring mouthpiece in your mouth using the spatula:

  • The large notch is the top.
  • Ensure that your lower and upper rows of front teeth are aligned.
  • Use your fingers, cheeks, and lips to mold the outside of the anti-snoring mouthpiece to your teeth.
    Use your tongue to mold the inside of the anti-snoring mouthpiece to your teeth.
  • Now suck any air out of the mouthpiece using your tongue and lips.
    Leave the anti-snoring mouthpiece in your mouth for 1 minute.

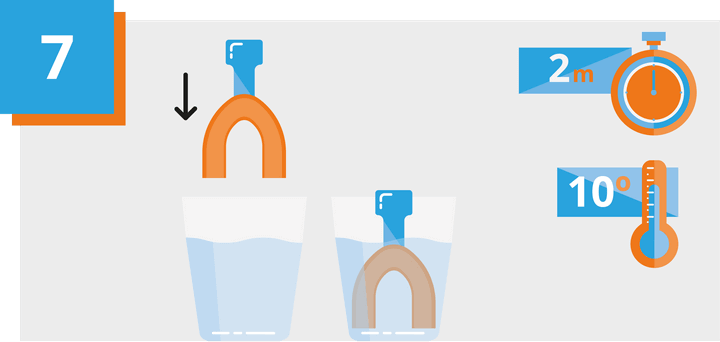
7. Place the anti snoring mouthpiece in the glass of cold water during 2 minutes.

8. Ultimately, take out the anti snoring mouthpiece and place it in your mouth. Now Mr. Anti Snore should be fit comfortably in your mouth.

If you find that the anti snoring mouthpiece does not feel comfortable, please repeat the process until it does.


Maintenance of Mr. Anti Snore

Maintaining Mr. Anti Snore can considerably improve the lifespan of your anti snoring mouthpiece. Easily wash of Mr. Anti Snore with cold water after usage and keep it in the dust free box.

Keep Mr. Anti Snore in spaces with room temperatures lower than 38 degrees Celsius.